How to apply Canada study permit is a question many international students ask when planning to study abroad. For international students, getting a Canadian study permit is more than paperwork. It’s the bridge to your academic goals, future career, and in many cases, permanent residency. If you’re planning to start your studies in 2026, this guide will walk you through each step of the process. Whether you’re applying from India, the Philippines, or anywhere else, we’ll break it down in plain language, no agents required.
How to Apply Canada Study Permit: Step-by-Step Process for 2026
Step 1 – Get Accepted by a Designated Learning Institution (DLI)
Before anything else, you need an official letter of acceptance from a DLI in Canada. These are approved schools where international students are eligible to enroll. You can search for DLIs on the IRCC website.
- Applying Without an Agent: Many students apply without an agent. It starts with identifying the program that suits your goals, then applying directly through the school’s admission portal. Keep all communication documented.
- Planning Your Timeline: Ideally, start your process 6–8 months before your desired intake. If you’re applying from outside Canada, account for application review time and biometric appointments.
- Real Case: Keiko from Tokyo secured admission to a DLI without an agent by emailing program coordinators directly and asking for virtual meetings. Her proactive follow-ups helped her receive her acceptance letter in just three weeks.
Step 2 – Gather Your Required Documents
Documents are the foundation of your application. Missing or unclear documents are among the top reasons for permit refusal.
- Acceptance Letter: Must be from a DLI.
- Valid Passport: It should be valid for the entire duration of your study.
- Photographs: Digital copies that meet IRCC specifications.
- Proof of Funds: Minimum of CAD 10,000/year for expenses (outside tuition). GIC (Guaranteed Investment Certificate) is a preferred option under the SDS route.
- Letter of Explanation (SOP): State your academic goals, why Canada, and why this course.
- Police Certificates and Medical Exams: Required for some countries and programs.
Real Case: Priya from Delhi prepared her SOP by highlighting her academic gap and explained her career path—this helped her overcome an earlier rejection.
Tip: Double-check if your medical exam is required based on country of residence. Missing it can delay processing.
Understanding the steps for a study permit for canada is essential for a smooth process.
Step 3 – How to Fill Canada Study Permit Form and Submit Your Application
IMM 1294 is the official study permit application form.
- Create an IRCC Secure Account at IRCC’s website.
- Upload all documents in the correct format (PDF preferred).
- Pay the application fee: Currently CAD 150.
Payment Methods: Use international credit card or online payment methods offered via IRCC.
Real Case: Abdul from Pakistan submitted his application from abroad and opted to use the online fee payment portal using a prepaid Visa card—approved in under 30 days.
Step 4 – Provide Biometrics & Visit VAC (Visa Application Centre)
After submitting, you’ll receive a Biometrics Instruction Letter (BIL).
- Book an appointment at your local VAC
- Bring your BIL, passport, and fee receipt
- Biometrics include photo and fingerprints, valid for 10 years.
Tip: Avoid rescheduling; delays may affect your application timeline.
Real Case: Lucía from Mexico received her BIL within 48 hours, booked her biometrics within the same week, and completed the process smoothly by carrying all originals in a transparent folder.
Step 5 – Wait for a Decision and Prepare to Enter Canada
Once you submit biometrics, most SDS applications are processed in around 20 days.
- SDS vs Regular Processing: SDS is faster but requires upfront GIC and IELTS.
- TRV or eTA: If approved, you’ll get a Port of Entry Letter and visa or eTA.
What to Pack: Carry your original documents, Port of Entry Letter, and school contact info.
Real Tip: Always have your tuition receipt and proof of accommodation handy when speaking with border officers.

What Happens If Your Study Permit Is Refused?
Rejection can happen. The most common reasons include unclear SOPs, insufficient proof of funds, or doubts about your intent.
How to Apply for Canada Study Permit After Refusal
- Request GCMS Notes to understand exact reason
- Rewrite SOP addressing the concerns
- Gather stronger documents (updated bank statements, additional ties to home country)
Example: Ahmed from Dubai was rejected due to “unclear intent.” He rewrote his SOP, added a parental affidavit and travel history—and got approved in the second round.
How to Extend Study Permit in Canada
Many students begin their journey with strong university preparation to ensure they meet admission requirements and deadlines. You should apply at least 30 days before your current permit expires.
When and How to Apply for Canada Study Permit Extension
- Submit online through your IRCC account
- Include transcript, enrollment letter, and updated bank documents
Tip: Use the IRCC Study Permit Extension Tool to check eligibility.
Starting early helps avoid disruptions to your studies or potential status issues.
If your permit expires before you apply, you may lose the right to study or work in Canada.
If you’re still exploring options, consider looking into top international schools in Canada that offer direct admission pathways and personalized academic support.
What Documents Are Needed for Study Permit Renewal
- Enrollment verification
- Updated passport
- Financial proof
You may also be asked to provide proof of continued academic progress or class attendance, depending on your institution and study level. It’s a good idea to keep digital copies of all required documents organized and ready to upload to avoid delays during the application process.
Case Insight: Marcus from Brazil extended his study permit while awaiting university admission. His prompt renewal ensured his status remained valid. Keeping your documents in order and renewing on time is crucial if you plan to study in Canada long term.
The Ultimate Canada Study Permit Checklist
Interactive Application Timeline
| Stage | Month |
| Research & Apply to DLI | Jan – Mar |
| Gather Documents | Apr – May |
| Submit Permit Application | Jun – Jul |
| Biometrics & Decision | Aug |
| Arrival in Canada | Sep |
Pre-Filled Document List
Before you begin your application, make sure you have the following documents prepared and ready for upload:
- Passport
- DLI Acceptance Letter
- Digital Photos
- GIC/Bank Proof
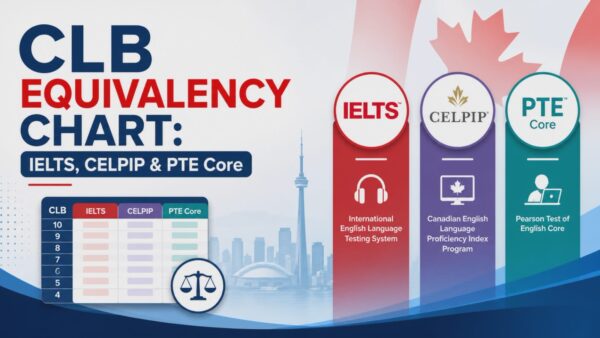
- IELTS Scorecard
- SOP
- Medical & Police Reports (if needed)
- Tuition Fee Payment Receipts
- Accommodation Confirmation
Conclusion
Applying for a Canadian study permit is a strategic process not just paperwork. Know your timelines, keep your documents airtight, and write a compelling SOP. Whether you’re going solo or with a spouse, your journey starts with clarity and preparation.
Final tip: Review your documents as if you were the visa officer. Be consistent, honest, and well-prepared.
Frequently Asked Questions About Canada Study Permits
1. Can I apply for a study permit without an agent?
Yes, you can absolutely apply for a Canada study permit without an agent. Many students prefer doing it themselves using the IRCC portal. You’ll need to ensure your documents are accurate, pay attention to deadlines, and clearly explain your study purpose in your SOP. For example, a student from Dubai managed her entire application solo and got approved within six weeks through the SDS route. Just make sure you double-check the form before submission.
2. What are the chances of approval if I apply from India?
Approval depends on how strong your application is—not just where you apply from. That said, Indian students have a relatively high approval rate, especially under the Student Direct Stream (SDS). In 2023, over 70% of SDS applications from India were approved. Your Statement of Purpose, financial proof, and acceptance from a DLI are crucial. One student from Pune strengthened his profile with a detailed SOP and GIC proof, securing a permit within 20 days.
3. Do I need to pay again for a reapplication?
Yes, if your initial study permit is refused, and you choose to reapply, you must pay the application fee again. The current fee is CAD 150. A student from Vietnam had to reapply after an initial rejection due to unclear financial proof. On the second attempt, she worked with a consultant to correct the gaps and successfully received approval. Always review GCMS notes before reapplying.
4. Can I work in Canada while on a study permit?
Yes, students with a valid study permit are allowed to work up to 20 hours per week during academic sessions and full-time during scheduled breaks. However, your permit must indicate the right to work. One international student from Nigeria took up a part-time role in customer service and gained valuable Canadian experience, which helped in her future PR application.
5. Can I apply for a Canada study permit while staying in a different country?
Yes, IRCC allows applications from outside your country of residence. For example, a student from Brazil residing in the UAE applied through the online portal while abroad. The key is to provide accurate residence and contact information and be ready to attend biometrics appointments wherever required. Timelines may vary slightly, but the process remains the same.